Taking photos underwater becomes straightforward with a full-face snorkel mask. These masks let you see more clearly and breathe naturally while you handle your camera. In this guide, you'll learn which equipment works best, how to handle your camera underwater, and ways to use natural light for better photos. We've included practical steps from basic setup to capturing clear shots of marine life. The techniques are simple, and you won't need complex gear to begin.

Why Full-Face Snorkel Masks Work Better for Underwater Photos
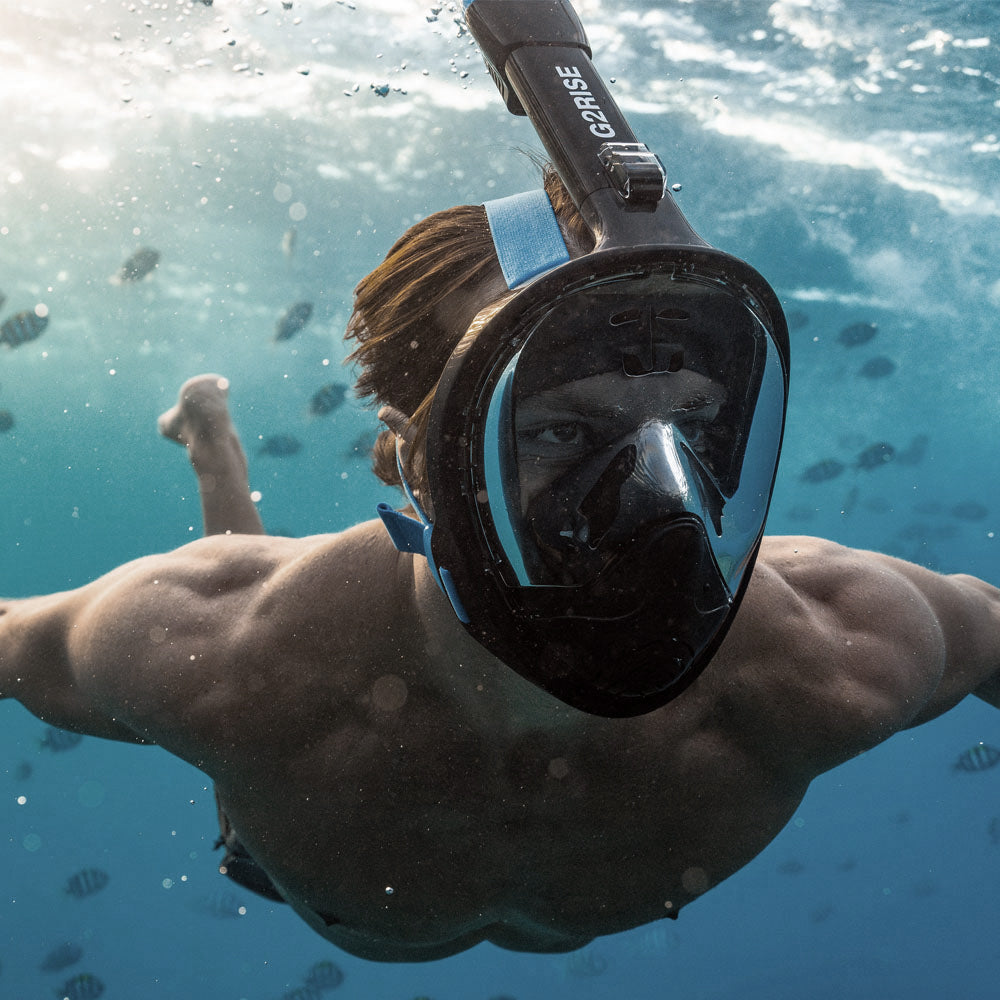
Full-face snorkel masks have transformed underwater photography for recreational snorkelers. These masks solve many common problems that photographers face with traditional mask-and-snorkel sets, making it much easier to capture clear photos underwater.
Better Visibility for Shooting
The wide-view panel gives you a clear 180-degree view of your surroundings, letting you spot and track subjects better than the narrow window of a traditional mask. This broader view helps you compose your shots more effectively.
No Fogging Problems
The mask's design separates the breathing area from the viewing area, which prevents your warm breath from fogging up the viewing panel. This means you'll have a consistently clear view for shooting without needing to surface and clear your mask.But if you don’t have full-face,there’s way to keep snorkel mask from fogging.
Natural Breathing While Shooting
Being able to breathe normally through your nose or mouth helps tremendously with photography. You can focus on getting the right angle and timing for your shots instead of thinking about breathing through a snorkel tube. This natural breathing also helps you stay steady in the water, resulting in sharper photos with less blur.
Dry Face, Better Focus
The mask keeps your face completely dry, so you won't get a runny nose or water in your mouth while concentrating on taking photos. The secure fit also reduces the chance of water leaks, which often ruin photo opportunities with traditional masks.
Hands-Free Operation
You won't need to constantly adjust your mask or clear water out, so you can keep your hands free for camera operation. The stable seal helps you maintain neutral buoyancy, making it easier to position yourself for the perfect shot.

Required Equipment for Underwater Photography
A proper setup starts with two key pieces: a full-face mask and an underwater camera. Quality gear makes a big difference in your photo results.
Full-Face Snorkel Mask Requirements
Face Seal and Comfort
The edge of the mask should press gently and evenly against your face. A good seal keeps water out without causing headaches. Your face should stay completely dry inside the mask, with no spots of pressure around your nose or forehead.
Air Flow System
The mask needs separate channels for inhaled and exhaled air. Fresh air should flow across the viewing panel while used air exits through different vents. This system keeps your view clear and prevents fogging during longer swims.
Viewing Panel Construction
The panel should span from temple to temple, with crystal-clear optical quality. Look for shatter-resistant material that won't scratch easily. Side visibility matters just as much as front visibility for spotting photo opportunities.
Camera Specifications
Technical Features
Your camera should capture at least 10 megapixels, handle low light well, and include stabilization for steady shots. Fast shutter response helps catch quick-moving fish and sea life.
Waterproof Design
The camera or its case must work at depths of at least 30 feet. All buttons should be large enough to press with wet fingers. The screen must be bright enough to see clearly in sunlit water.
Mounting Options
Make sure the camera connects firmly to your mask or handle. The mount should let you adjust angles quickly but lock securely. Strong mounting prevents camera loss and keeps your shots stable.

How to Take Better Underwater Photos
A good camera and mask give you the tools to start - but taking clear underwater photos requires specific techniques. Here's what works best in the water.
Getting the Right Composition
Get close to your subjects - three to five feet works best. Shoot slightly upward to show depth and catch more light. Place interesting subjects where imaginary lines divide your frame into thirds. When photographing fish, leave space in front of them where they're swimming.
Working with Natural Light
Keep the sun at your back while shooting. Stay in shallow water (5-15 feet) where colors appear brightest. Early morning and mid-afternoon provide the best light angles. Cloudy days can help by softening harsh shadows underwater.
Adjusting Your Camera
Set a fast shutter speed (1/250 or faster) to prevent blur. Use your camera's underwater mode to improve colors. In clear water, keep ISO between 100-400. Switch to burst mode when photographing moving fish or sea life.
Managing Colors and Clarity
Colors fade as you go deeper - red disappears first, then orange, and yellow. Use color correction mode at deeper depths. Take a test shot of sand or a white slate to set proper white balance. Clear water and bright sun give you the sharpest photos.
Capturing Movement
Stay still and let fish get comfortable with your presence. Start shooting slightly before the action you want to capture. Move sideways instead of swimming straight at your subject. Keep your body level to avoid tilted horizons in your shots.

How to Stay Safe During Underwater Photography
Beyond photo techniques and equipment setup, your safety and marine protection come first. Follow these key rules.
Know Your Limits
Exit the water before you feel tired and equalization problem, even if you haven't gotten your perfect shot. Choose areas that match your swimming ability - good photos aren't worth risking your safety. Don't chase sea life into deeper water or areas with poor visibility. During longer photo sessions, take breaks every 30 minutes to check your position and energy level.
Watch Marine Life Rules
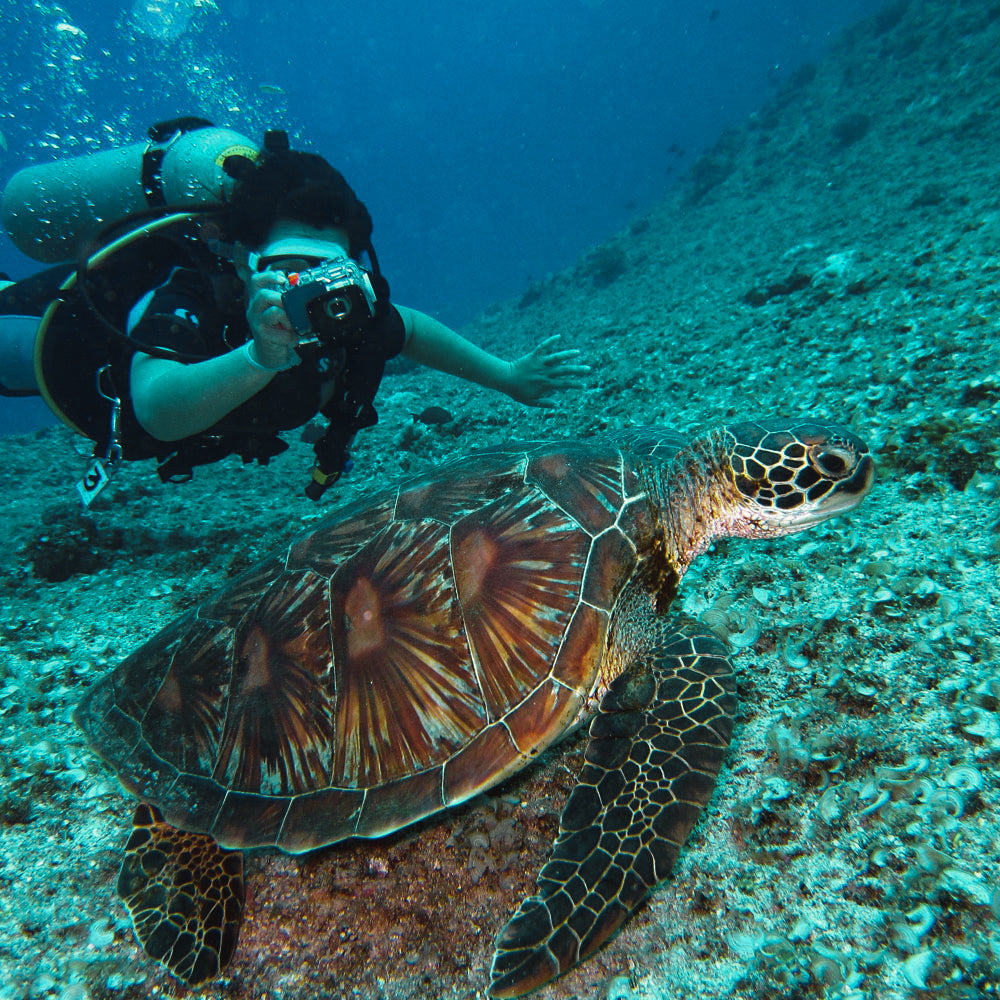
Keep at least 3 feet away from all coral reefs, as even slight contact can damage these delicate ecosystems. When photographing fish or other sea creatures, wait patiently for them to approach you naturally. Rushing or chasing after them usually results in poor photos and can harm the animals. Never touch or feed marine life to get a better shot.
Check Area Restrictions
Research the rules for each marine park or beach before you start shooting. Many locations have specific hours when photography is allowed and areas where it's restricted. Get any required permits ahead of time. Some protected areas have strict rules about approaching certain species or using camera equipment.
Monitor Conditions
Stop shooting if the water gets rough or if strong currents develop - no photo is worth the risk. Watch for changes in water clarity, as poor visibility can disorient you. Pay attention to weather changes and exit immediately if you see signs of an approaching storm.
Respect Other Photographers
Share popular photo spots and don't crowd other photographers. Many good photos can be taken from the same area if everyone works together respectfully. Keep your distance from other swimmers and avoid using flash near them. Help preserve these areas by removing any trash you find, ensuring others can enjoy them too.
Common Problems and Quick Fixes
Even with good equipment and technique, you'll face some challenges while shooting underwater. Here's how to handle the most frequent issues.
Poor Water Visibility
Murky water ruins photos quickly. Move to shallower areas where sunlight helps visibility. Shoot in the morning before other swimmers stir up sand. Get closer to your subjects - three feet or less in unclear water. Use your camera's HDR mode to bring out more detail in low-visibility conditions.
Foggy Mask and Lens
If your mask fogs up, don't remove it - this often makes the problem worse. Apply anti-fog treatment before each swim, giving it time to dry properly. Keep your breathing steady and relaxed to maintain proper airflow. For camera fog, check all seals are tight and dry before entering water. Add a small moisture-absorbing packet to your camera case between uses.
Shaky or Blurry Photos
Stay still by tucking your elbows against your body while shooting. Control your breathing - take photos between breaths when you're most stable. In stronger currents, use nearby rocks or sand to steady yourself, but never grab coral. Increase your shutter speed in challenging conditions. Take several shots of the same subject to ensure at least one turns out sharp.
Camera Problems
If your camera stops working, check for water drops on the lens first. Clean it with the corner of your towel or mask. Battery drain happens faster in cold water - carry spares and keep them warm until needed. If buttons get stuck, rinse with fresh water. End your session if you notice any signs of leaking or unusual camera behavior.
Focus Failures
Auto-focus often struggles underwater. Switch to manual focus for better control. Choose high-contrast subjects that are easier for your camera to lock onto. Use center-point focus rather than multi-point in unclear water. When shooting fish, focus on their eyes for the sharpest results.

Take Great Underwater Photos Today!
Anyone can take good underwater photos with a full-face snorkel mask and basic camera. The key is starting with the right gear, following safety rules, and practicing simple photo techniques. Get comfortable with your equipment in shallow water first. Pay attention to lighting and composition while respecting marine life and other photographers. You might face some challenges like foggy masks or unclear water, but the solutions are straightforward. Also don’t forget to clean your full-face snorkel mask.

Leave a comment
This site is protected by hCaptcha and the hCaptcha Privacy Policy and Terms of Service apply.